CAREER MONDAY
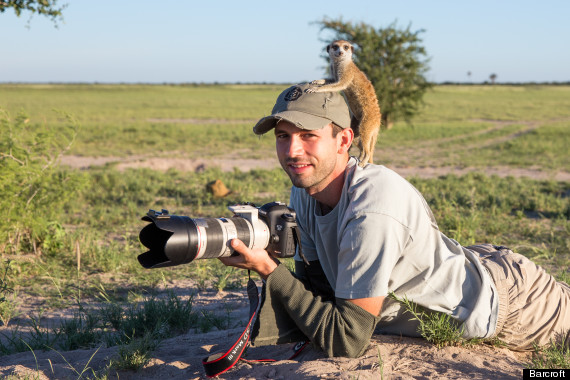
WILDLIFE PHOTOGRAPHER
Do you love animals? Do you love nature? Do you love to travel? Then maybe a career in wildlife photography is for you!
Wildlife Photography
![]()
TIPS AND TRICKS TUESDAY
The Golden Hour
There is a magical hour, a time when the light from the sun shines on the Earth from the side. During this hour, light is warm, soft, and perfect for taking pictures. If the light hits the clouds in the sky at just the right angle, they give off a purplish color that accents a scene in ways nothing else can. To start taking better pictures now, you need to get the most out of the Golden Hour. Here are a few ideas.
The Golden Hour
PHOTOSHOP WEDNESDAY
Fixing Foliage
From NY Falls
Click on the image Fixing-Foliage.jpg, right click and Save Image As, and then open it in Photoshop.
Let’s try two quick adjustments that work great on green foliage.
|
 The original photo has decent exposure and the colors aren’t bad, but the foliage could use more definition and richer color. The original photo has decent exposure and the colors aren’t bad, but the foliage could use more definition and richer color. |
Your Layers Palette: |
This will drastically increase the contrast of the whole photo. |
 The effect is a little strong, but we will fix it. The effect is a little strong, but we will fix it. |
Curves Adjustment panel:
 |
Ignore the rock and water; we will mask that out of this adjustment next. |
 |
Back to the Layers Palette: |
We only want the contrast to apply to the foliage, so we want to mask it from the rock and water.
When painting black on a mask canvas, you won’t see black appear on your image. You will just see the removal of the effect in the places that you paint. You WILL see black being painted on the canvas icon in the layers palette (6). |
 |
 |
The foliage now has a bit more “pop” to it, but I also want to make the color a bit more lush green. We have already created a mask that isolates our green foliage, so let’s start by using that.
If you have something on your canvas selected when you create an adjustment layer, it automatically creates a mask for that adjustment layer so only your selection is affected by the adjustment. Very convenient! |
 Ctrl-clicking a mask creates a selection from that mask. Ctrl-clicking a mask creates a selection from that mask. |
 |
You can play with more dramatic settings to get different effects. Try adjusting the Hue to get more fall colors. |
 |
 |
Final Results
| Original |
Enhanced foliage |
 Dramatic color Dramatic color |
 More dramatic color More dramatic color
|
![]()