CAREER MONDAY
Architectural PHOTOGRAPHER
Do you love the angles and forms of architecture? Or do you like to design an interior space and capture it in the best light? If so, then maybe architectural photography is for you.
Architectural Photography
Architectural Photography 2
TIPS AND TRICKS TUESDAY
How to Photograph Panoramas
How do you capture panoramic images that will be used to create a panorama? There are three ways to capture panoramic images:
- Taking horizontal shots – an easy method for quick panoramas, where resolution is not important. Here are two sample horizontal shots:
 And here is the final stitched panorama:

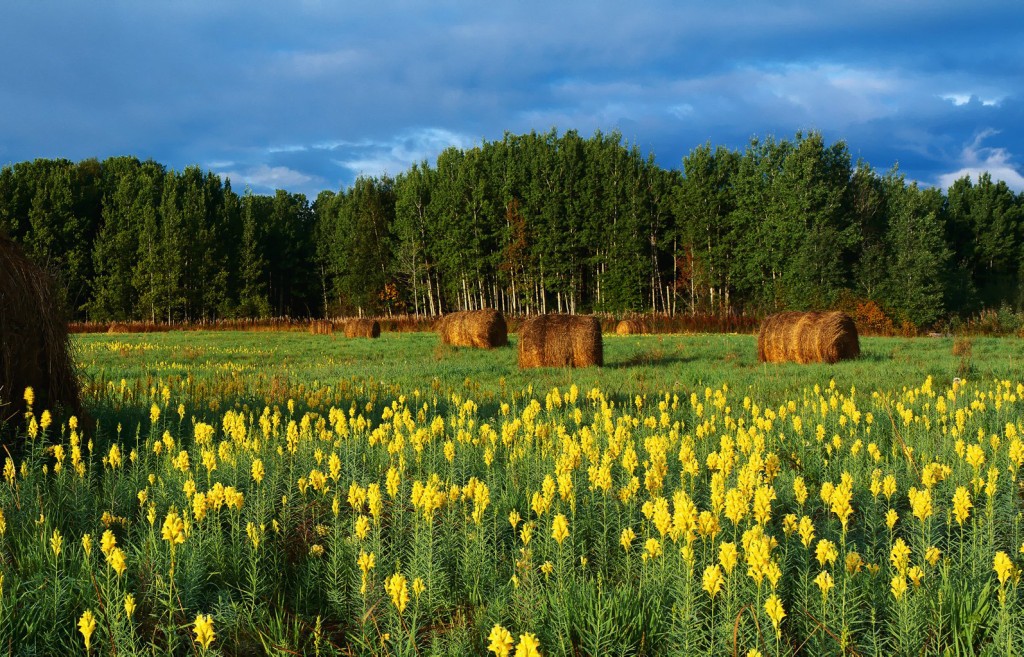
- Taking vertical shots – a preferred way to capture panoramas. Vertical images capture more of the sky and ground and yield higher resolution panoramas compared to horizontal ones. Here are four vertical shots:
 And here is the final stitched panorama:
- Or you can always use the panorama mode if your camera has it!

Try to avoid shooting horizontally, because you lose too much resolution due to some cropping that is required after the panorama is stitched by software. Vertical panoramas are much better in that regard and they always yield more resolution than horizontal panoramas.
As you can see from the above sample images, the shots overlap each other by approximately 50%. In order for any program to be able stitch multiple images together, the images have to overlap each other by a certain margin, so that alignment points are properly identified. The alignment points serve as flags for the stitching algorithm that seamlessly merges the images and cuts out the rest of the image. The overlap margin is a subject of opinion and while some people recommend 20-30% overlap, it is recommended to do it by 50%.
Shooting Technique
- Identify the area you want to photograph. The first thing you need to do, is identify what you want to capture. The best candidates for panoramic images are overlooks, i.e. standing on the top of a mountain or hill, or looking down from an elevated area with no near objects. Avoid shooting panoramas with trees, bushes and other objects in the foreground, unless you have special calibrated panoramic equipment. If you are shooting a scene that is far away from you, the panorama will stitch perfectly, because the software will not have to deal with parallax errors.
- Watch for wind and other moving objects. Wind can move tree leaves, grass, water and sand in different directions, which will spoil your panorama. Only shoot in windy conditions when the wind strongly moves everything in one direction. Avoid taking pictures of moving water waves.
- If you will be using a tripod, set the tripod on a firm surface and level it. Once it is leveled, mount your camera on the tripod horizontally or vertically and firmly tighten it. Make sure that you can freely pan the camera from one side to another without letting it change any angles. Try to watch for alignment errors by matching the lines in your viewfinder with the horizon.
- If shooting hand-held, keep the camera close to your eye and look through the viewfinder instead of the back LCD. Pan from left to right and see whether you can keep the camera straight and aligned against the horizon.
- Set your camera settings.
- Check camera focus.
- Note the starting point and ending point you will be photographing and visually remember both.
- Take a single picture and see if the image looks good on the back LCD. If the image looks good, you are ready to shoot. If it doesn’t, check your settings and make changes, if necessary.
- Point your camera at your starting point on the left and take the first picture. Before you move the camera, remember where your center focus point inside your viewfinder is pointing, then start moving the camera to the right, until that point is at the center edge of the frame. This basically means that you will be overlapping your new image with the first one by approximately 50%. Take a picture and repeat this process until you get to the end point. Remembering where the center focus point is at relative to the scene is the easiest and safest way for me to make sure that the images overlap enough for post-processing software to be able to stitch them later. You can certainly overlap them by a smaller margin and decrease the total number of images, so it is totally up to you on how you want to do this. Just make sure that the images overlap by at least 20% and there are visible stationary objects that will allow the stitching program to identify them and connect them later.
- If shooting hand-held, stand in one spot, keep your elbows close to your body and rotate only the upper part of your body, keeping the camera close to your head at all times. Imagine that your legs are a tripod and your upper body is a tripod head. This will minimize the effect of parallax on your images. If you have any nearby objects and you want to try to minimize parallax errors, try the following technique: using your left thumb and index fingers, hold the middle of the lens and try to take pictures while not moving your arm (your body needs to remain still). This is difficult to do because you will not be able to look through the viewfinder, but not impossible 🙂 I have taken a few panoramic images this way and they stitched perfectly! Each lens is different and the entrance pupil (which is the point where close and distant objects keep their relative positions when the lens is rotated) location also varies depending on mechanical and optical characteristics of the lens. Your two fingers need to hold the bottom of the lens where the entrance pupil is (not the nodal point like many incorrectly assume) and the camera needs to rotate around it.
- Once you are done taking the pictures, visually inspect all images on the LCD at least once to make sure that you do not have any problems with your setup.

Black Canyon, captured hand-held
Challenges with Panoramic Photography
The biggest challenge with panoramic photography is stitching problems due to parallax errors.

PHOTOSHOP WEDNESDAY
Panoramic Landscapes
Click on the following photos and select “Save Image As”. Save both photos to your 2nd Quarter folder.

Stitching panoramas in Photoshop is super easy. Simply open up Photoshop and then go to “File”->”Automate”->Photomerge…”. A dialog box will come up that looks like this:

Click “Browse” and select the images to be merged into a panorama. Make sure that “Blend Images Together” and “Geometric Distortion Correction” are checked, then click OK. This will start the stitching process, which can sometimes take a long time, depending on the number of images and their size.

Once the process is completed, all you have to do is crop the image and you are all set!
WHAT’S TRENDING? THURSDAY
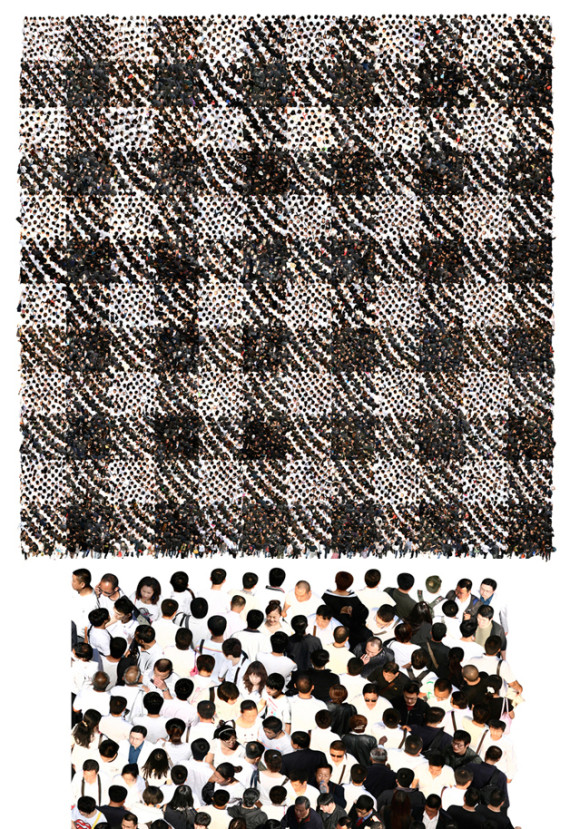
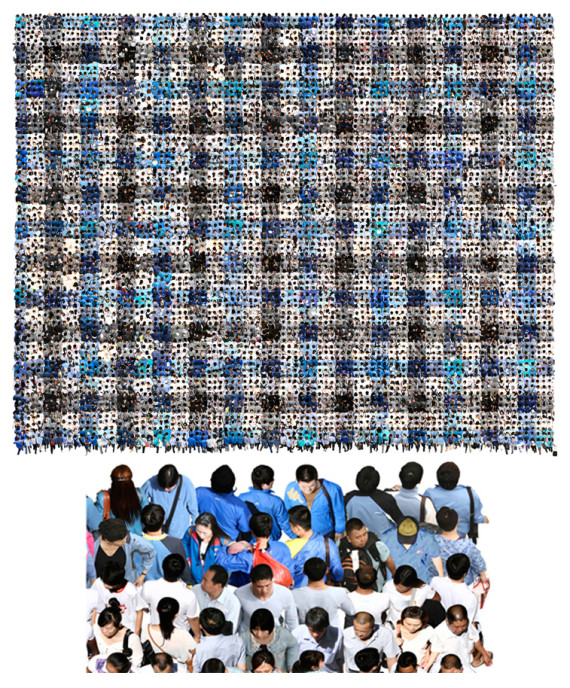
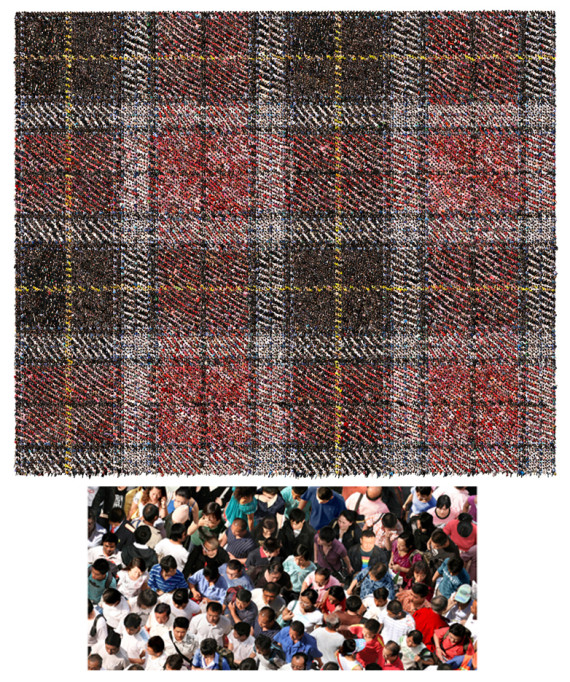
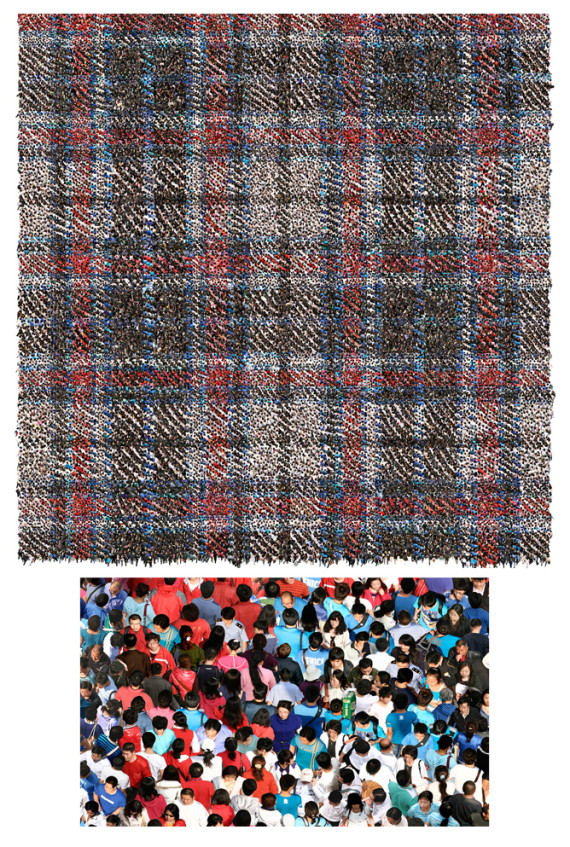
This Artist’s Beautiful Plaid Swatches Are Made Entirely Out Of Teeny, Tiny People
The Huffington Post | By Sara Boboltz
Posted: Updated:
Everyone always seemed tired, Zhang explained in an artist’s statement. Indeed, forover thirty years, the Chinese government has pushed rural citizens towards its rapidly expanding cities with the promise of employment. Just earlier this week, the government made life in new cities a bit easier by granting access to education and unemployment benefits for people outside their hometowns.
But many feel unsettled, Zhang wrote, traveling back and forth between city and country, “like migratory birds.” And the crowds he photographed rendered individuals “just like ants.”
Separating the individuals in his images and regrouping them to form patterns leaves Zhang’s work open to interpretation, argues French photo journal The Eye of Photography. His large-format composite photographs could be viewed as “purely formal.” Or alternatively — and as Zhang suggests in his statement — the project represents a collective struggle. Indeed, city life has proved grating on young migrant workers, who commonly suffer depression and anxiety. The work “is all about people,” Zhang explained.
Take a look at some of his incredible images below, courtesy of OFOTO Gallery in Shanghai.


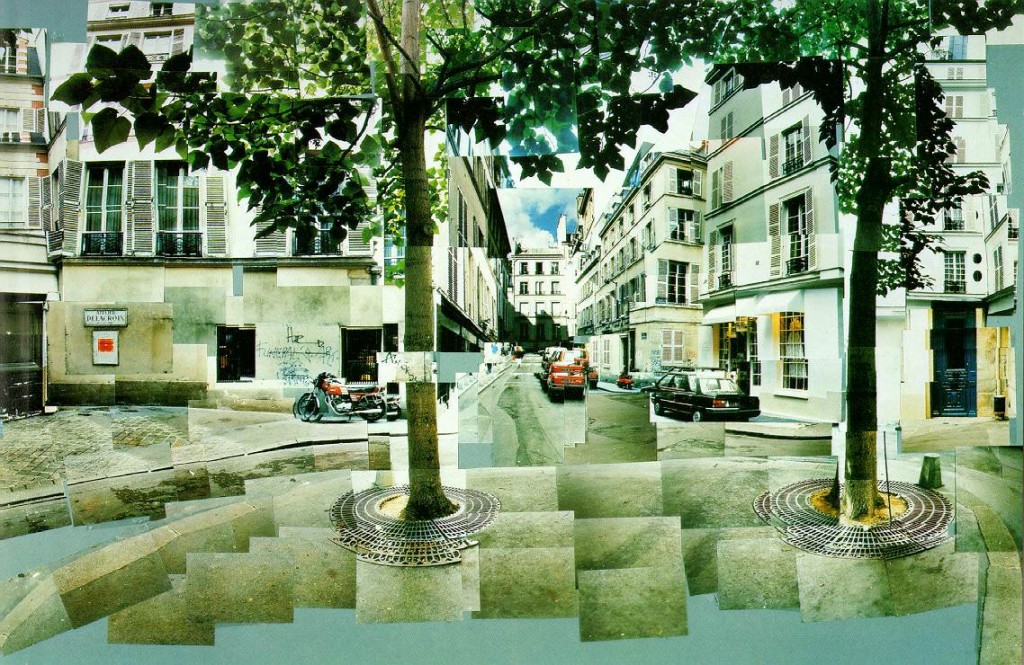
PHOTOGRAPHER FRIDAY
David Hockney